Tekton Hello World
 Tekton 作为 Knative Build 模块的升级版,提供了更丰富的功能,可以适用更多的场景。如果你知道 Knative Build 是什么相信你理解起 Tekton 就是很容易的一件事了。
- Knative Build 对自己的一句话概述是:
A Kubernetes-native Build resource. - Tekton 对自己的一句话概述是:
A K8s-native Pipeline resource. https://tekton.dev可以看到两者的定位非常相近,而且在功能上 Tekton 的设计更加的丰富、完整,这也是社区最终采用 Tekton 替代 Build 的原因。接下来我们就看一下 Tekton 的核心概念。
Tekton 极速入门
Tekton 主要由如下五个核心概念组成:
- Task
- TaskRun
- Pipeline
- PipelineRun
- PipelineResource
这五个概念每一个都是以 CRD 的形式提供服务的,下面分别简述一下这五个概念的含义。
Task Task 就是一个任务执行模板,之所以说 Task 是一个模板是因为 Task 定义中可以包含变量,Task 在真正执行的时候需要给定变量的具体值。如果把 Tekton 的 Task 有点儿类似于定义一个函数,Task 通过 inputs.params 定义需要哪些入参,并且每一个入参还可以指定默认值。Task 的 steps 字段表示当前 Task 是有哪些步骤组成的,每一个步骤具体就是基于镜像启动一个 container 执行一些操作,container 的启动参数可以通过 Task 的入参使用模板语法进行配置。
apiVersion: tekton.dev/v1alpha1
kind: Task
metadata:
  name: task-with-parameters
spec:
  inputs:
    params:
      - name: flags
        type: array
      - name: someURL
        type: string
  steps:
    - name: build
      image: registry.cn-hangzhou.aliyuncs.com/knative-sample/alpine:3.9
      command: ["sh", "-c"]
      args: [ "echo ${inputs.params.flags} ; echo ${someURL}"]
TaskRun Task 定义好以后是不能执行的,就像一个函数定义好以后需要调用才能执行一样。所以需要再定义一个 TaskRun 去执行 Task。TaskRun 主要是负责设置 Task 需要的参数,并通过 taskRef 字段引用要执行的 Task。
apiVersion: tekton.dev/v1alpha1
kind: TaskRun
metadata:
  name: run-with-parameters
spec:
  taskRef:
    name: task-with-parameters
  inputs:
    params:
      - name: flags
        value: "--set"
      - name: someURL
        value: "https://github.com/knative-sample"
Pipeline 一个 TaskRun 只能执行一个 Task,当需要编排多个 Task 的时候就需要 Pipeline 出马了。Pipeline 是一个编排 Task 的模板。Pipeline 的 params 声明了执行时需要的入参。 Pipeline 的 spec.tasks 定义了需要编排的 Task。Tasks 是一个数组,数组中的 task 并不是通过数组声明的顺序去执行的,而是通过 runAfter 来声明 task 执行的顺序。Tekton controller 在解析 CRD 的时候会解析 Task 的顺序,然后根据 runAfter 设置生成的依次树依次去执行。Pipeline 在编排 Task 的时候需要给每一个 Task 传入必须的参数,这些参数的值可以来自 Pipeline 自身的 params 设置。
apiVersion: tekton.dev/v1alpha1
kind: Pipeline
metadata:
  name: pipeline-with-parameters
spec:
  params:
    - name: context
      type: string
      description: Path to context
      default: /some/where/or/other
  tasks:
    - name: task-1
      taskRef:
        name: build
      params:
        - name: pathToDockerFile
          value: Dockerfile
        - name: pathToContext
          value: "${params.context}"
    - name: task-2
      taskRef:
        name: build-push
	  runAfter:
        - source-to-image
      params:
        - name: pathToDockerFile
          value: Dockerfile
        - name: pathToContext
          value: "${params.context}"
PipelineRun 和 Task 一样 Pipeline 定义完成以后也是不能直接执行的,需要 PipelineRun 才能执行 Pipeline。PipelineRun 的主要作用是给 Pipeline 传入必要的入参,并执行 Pipeline
apiVersion: tekton.dev/v1alpha1
kind: PipelineRun
metadata:
  name: pipelinerun-with-parameters
spec:
  pipelineRef:
    name: pipeline-with-parameters
  params:
    - name: "context"
      value: "/workspace/examples/microservices/leeroy-web"
PipelineResource 前面已经介绍了 Tekton 的四个核心概念。现在我们已经知道怎么定义 Task、执行 Task 以及编排 Task 了。但可能你还想在 Task 之间共享资源,这就是 PipelineResource 的作用。比如我们可以把 git 仓库信息放在 PipelineResource 中。这样所有 Task 就可以共享这些信息了。
piVersion: tekton.dev/v1alpha1
kind: PipelineResource
metadata:
  name: wizzbang-git
  namespace: default
spec:
  type: git
  params:
    - name: url
      value: https://github.com/wizzbangcorp/wizzbang.git
    - name: revision
      value: master
授权信息 git 仓库、镜像仓库这些都是需要鉴权才能使用的。所以还需要一种设定鉴权信息的机制。Tekton 本身是 Kubernetes 原生的编排系统。所以可以直接使用 Kubernetes 的 ServiceAccount 机制实现鉴权。 实例如下:
- 定义一个保存镜像仓库鉴权信息的 secret
apiVersion: v1
kind: Secret
metadata:
  name: ack-cr-push-secret
  annotations:
    tekton.dev/docker-0: https://registry.cn-hangzhou.aliyuncs.com
type: kubernetes.io/basic-auth
stringData:
  username: <cleartext non-encoded>
  password: <cleartext non-encoded>
- 定义 ServiceAccount ,并且使用上面的 secret
apiVersion: v1
kind: ServiceAccount
metadata:
  name: pipeline-account
secrets:
- name: ack-cr-push-secret
- PipelineRun 中引用 ServiceAccount
apiVersion: tekton.dev/v1alpha1
kind: PipelineRun
metadata:
  generateName: tekton-kn-sample-
spec:
  pipelineRef:
    name: build-and-deploy-pipeline
... ...
  serviceAccount: pipeline-account
Hello World
https://github.com/knative-sample/tekton-knative/tree/b1.0 这是一个完整的 Tekton 的 Helle World。下面我们一起体验一下这个 Helle World。 在开始实战之前你需要有一个 Kubernetes 集群,并还需要安装 Knative 和 Tekton,本文是基于 Tekton 最新的 0.8.0 版本写的 Demo。下面我们开始体验使用 Tekton 从源码到构建再到部署的自动化过程。
clone 代码 clone 代码到本地,切换到 b1.0 分支, 到 tekton-cicd 目录进行后面的操作。
git clone https://github.com/knative-sample/tekton-knative
git checkout b1.0
创建 PipelineResource
主要内容在 resources/picalc-git.yaml 文件中。如下所示主要是把 https://github.com/knative-sample/tekton-knative/tree/b1.0 保存在 resource 中给其他资源使用。
apiVersion: tekton.dev/v1alpha1
kind: PipelineResource
metadata:
  name: tekton-knative-git
spec:
  type: git
  params:
    - name: revision
      value: b1.0
    - name: url
      value: https://github.com/knative-sample/tekton-knative
创建 task 创建 task,这个例子中我们创建两个 task:source-to-image 和 deploy-using-kubectl
- source-to-image
主要内容在
tasks/source-to-image.yaml文件中。此 task 的主要功能是把源代码编译成镜像。 主要是使用 kaniko 实现容器内编译 Docker 镜像的能力。此 Task 的参数主要是设置编译上下文的一些信息,比如:Dockerfile、ContextPath 以及目标镜像 tag 等。
 apiVersion: tekton.dev/v1alpha1
kind: Task
metadata:
  name: source-to-image
spec:
  inputs:
    resources:
      - name: git-source
        type: git
    params:
      - name: pathToContext
        description: The path to the build context, used by Kaniko - within the workspace
        default: .
      - name: pathToDockerFile
        description: The path to the dockerfile to build (relative to the context)
        default: Dockerfile
      - name: imageUrl
        description: Url of image repository
      - name: imageTag
        description: Tag to apply to the built image
        default: "latest"
  steps:
    - name: build-and-push
      image: registry.cn-hangzhou.aliyuncs.com/knative-sample/kaniko-project-executor:v0.10.0
      command:
        - /kaniko/executor
      args:
        - --dockerfile=$(inputs.params.pathToDockerFile)
        - --destination=$(inputs.params.imageUrl):$(inputs.params.imageTag)
        - --context=/workspace/git-source/$(inputs.params.pathToContext)
      env:
      - name: DOCKER_CONFIG
        value: /builder/home/.docker
- deploy-using-kubectl
主要内容在
tasks/deploy-using-kubectl.yaml文件中。 如下所示这个 Task 主要的作用是通过参数获取到目标镜像的信息,然后执行一条 sed 命令把 Knative Service yaml 中的__IMAGE__替换成目标镜像。再通过 kubectl 发布到 Kubernetes 中。
apiVersion: tekton.dev/v1alpha1
kind: Task
metadata:
  name: deploy-using-kubectl
spec:
  inputs:
    resources:
      - name: git-source
        type: git
    params:
      - name: pathToYamlFile
        description: The path to the yaml file to deploy within the git source
      - name: imageUrl
        description: Url of image repository
      - name: imageTag
        description: Tag of the images to be used.
        default: "latest"
  steps:
    - name: update-yaml
      image: alpine
      command: ["sed"]
      args:
        - "-i"
        - "-e"
        - "s;__IMAGE__;$(inputs.params.imageUrl):$(inputs.params.imageTag);g"
        - "/workspace/git-source/$(inputs.params.pathToYamlFile)"
    - name: run-kubectl
      image: registry.cn-hangzhou.aliyuncs.com/knative-sample/kubectl:v0.5.0
      command: ["kubectl"]
      args:
        - "apply"
        - "-f"
        - "/workspace/git-source/$(inputs.params.pathToYamlFile)"
定义 Pipeline 现在我们已经有两个 Task 了,现在我们就用一个 PIpeline 来编排这两个 Task:
apiVersion: tekton.dev/v1alpha1
kind: Pipeline
metadata:
  name: build-and-deploy-pipeline
spec:
  resources:
    - name: git-source
      type: git
  params:
    - name: pathToContext
      description: The path to the build context, used by Kaniko - within the workspace
      default: src
    - name: pathToYamlFile
      description: The path to the yaml file to deploy within the git source
    - name: imageUrl
      description: Url of image repository
    - name: imageTag
      description: Tag to apply to the built image
  tasks:
  - name: source-to-image
    taskRef:
      name: source-to-image
    params:
      - name: pathToContext
        value: "$(params.pathToContext)"
      - name: imageUrl
        value: "$(params.imageUrl)"
      - name: imageTag
        value: "$(params.imageTag)"
    resources:
      inputs:
        - name: git-source
          resource: git-source
  - name: deploy-to-cluster
    taskRef:
      name: deploy-using-kubectl
    runAfter:
      - source-to-image
    params:
      - name: pathToYamlFile
        value:  "$(params.pathToYamlFile)"
      - name: imageUrl
        value: "$(params.imageUrl)"
      - name: imageTag
        value: "$(params.imageTag)"
    resources:
      inputs:
        - name: git-source
          resource: git-source
鉴权信息 如下所示,定义一个 Secret 和 ServiceAccount。并且给 ServiceAccount 绑定执行 Knative Service 的权限。
首先创建一个 Secret 保存镜像仓库的鉴权信息,如下所示:
- tekton.dev/docker-0 换成你要推送的镜像仓库的地址
- username 换成镜像仓库鉴权的用户名
- password 环境镜像仓库鉴权的密码
apiVersion: v1
kind: Secret
metadata:
  name: ack-cr-push-secret
  annotations:
    tekton.dev/docker-0: https://registry.cn-hangzhou.aliyuncs.com
type: kubernetes.io/basic-auth
stringData:
  username: <cleartext non-encoded>
  password: <cleartext non-encoded>
下面这些信息保存到文件中,然后使用 kubectl apply -f 指令提交到 Kubernetes
---
apiVersion: v1
kind: ServiceAccount
metadata:
  name: pipeline-account
secrets:
- name: ack-cr-push-secret

---

apiVersion: v1
kind: Secret
metadata:
  name: kube-api-secret
  annotations:
    kubernetes.io/service-account.name: pipeline-account
type: kubernetes.io/service-account-token

---

kind: Role
apiVersion: rbac.authorization.k8s.io/v1
metadata:
  name: pipeline-role
rules:
- apiGroups: ["serving.knative.dev"]
  resources: ["services"]
  verbs: ["get", "create", "update", "patch"]

---

apiVersion: rbac.authorization.k8s.io/v1
kind: RoleBinding
metadata:
  name: pipeline-role-binding
roleRef:
  apiGroup: rbac.authorization.k8s.io
  kind: Role
  name: pipeline-role
subjects:
- kind: ServiceAccount
  name: pipeline-account
定义 PIpelineRun
ServiceAccount 对应的鉴权信息是通过和 PIpelineRun 绑定的方式执行的。参见 run/picalc-pipeline-run.yaml 文件
apiVersion: tekton.dev/v1alpha1
kind: PipelineRun
metadata:
  generateName: tekton-kn-sample-
spec:
  pipelineRef:
    name: build-and-deploy-pipeline
  resources:
    - name: git-source
      resourceRef:
        name: tekton-knative-git
  params:
    - name: pathToContext
      value: "src"
    - name: pathToYamlFile
      value: "knative/helloworld-go.yaml"
    - name: imageUrl
      value: "registry.cn-hangzhou.aliyuncs.com/knative-sample/tekton-knative-helloworld"
    - name: imageTag
      value: "1.0"
  serviceAccount: pipeline-account
运行 Tekton HelloWorld 准备 PIpeline 的资源
kubectl apply -f tasks/source-to-image.yaml -f tasks/deploy-using-kubectl.yaml -f resources/picalc-git.yaml -f image-secret.yaml -f pipeline-account.yaml -f pipeline/build-and-deploy-pipeline.yaml
执行 create 把 pipelieRun 提交到 Kubernetes 集群。之所以这里使用 create 而不是使用 apply 是因为 PIpelineRun 每次都会创建一个新的,kubectl 的 create 指令会基于 generateName 创建新的 PIpelineRun 资源。
kubectl create -f run/picalc-pipeline-run.yaml
查看一下 pod 信息可能是下面这样:
└─# kubectl get pod
NAME                                                        READY   STATUS      RESTARTS   AGE
tekton-kn-sample-45d84-deploy-to-cluster-wfrzx-pod-f093ef   0/3     Completed   0          8h
tekton-kn-sample-45d84-source-to-image-7zpqn-pod-c2d20c     0/2     Completed   0          8h
此时查看 Knative service 的配置:
└─# kubectl get ksvc
NAME                            URL                                                                LATESTCREATED                         LATESTREADY                           READY   REASON
tekton-helloworld-go            http://tekton-helloworld-go.default.knative.kuberun.com            tekton-helloworld-go-ntksb            tekton-helloworld-go-ntksb            True
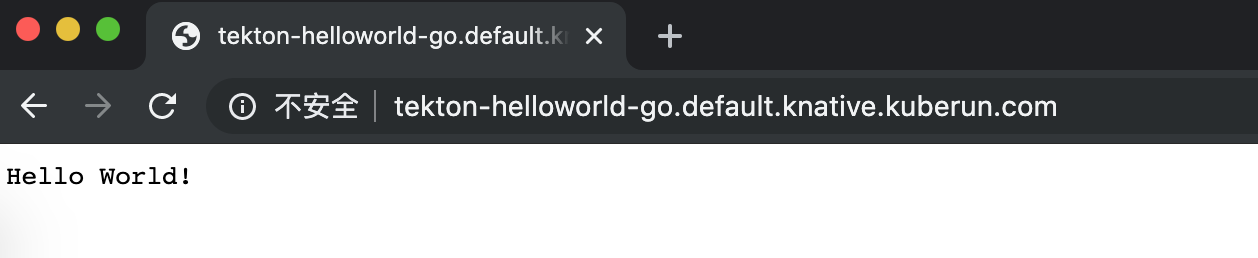
通过浏览器访问 http://tekton-helloworld-go.default.knative.kuberun.com 可以看到 hello World
参考资料
- knative-sample/tekton-knative https://github.com/knative-sample/tekton-knative/tree/b1.0